DNA quantification methods: determine the concentration, yield and purity of samples
Written by Éva Mészáros
29. May 2024
Accurate DNA quantification is key for many molecular biology workflows. Without precise knowledge of your sample's concentration, yield and purity, the success of downstream applications can be put at risk. This article describes the different methods available for quantifying DNA, highlighting their strengths, weaknesses and the essential equipment you'll need to perform them. Please note that most of the techniques explained in this article can also be used if you want to quantify RNA instead of DNA.
This article is part of a series of 5 blogs, explaining how to get from samples to pure DNA.
Table of contents

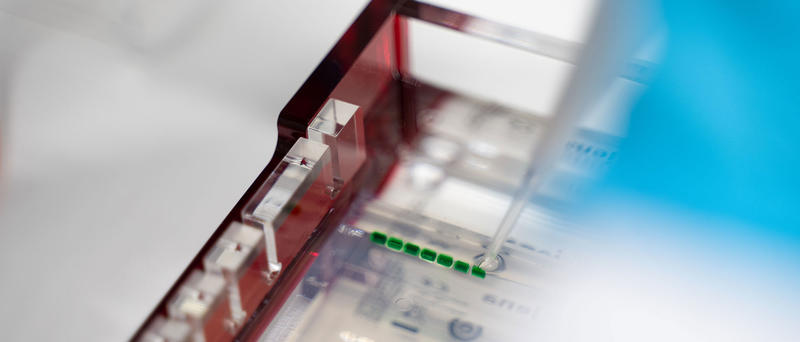
Agarose gel electrophoresis
Gel electrophoresis
Gel electrophoresis is a technique used to separate molecules like DNA, RNA or proteins based on their size and charge. Samples are loaded into wells at one end of a gel, and an electric current is applied. The molecules travel faster or slower through the gel depending on their charge and size, allowing them to be separated from one another.
Gel electrophoresis can be performed with different types of gels, each of which is suitable for a different sample type. DNA is usually analyzed with an agarose gel.
How does it work?
For agarose gel electrophoresis, you first cast a gel by dissolving agarose – a natural polysaccharide derived from a type of seaweed1 – in a conductive buffer and allowing it to set in a gel tray. Next, use a plastic comb to create sample wells. Once the gel has set, place the tray in a gel tank filled with a conductive buffer solution or add the buffer solution into the gel tray, mix your DNA samples with a loading dye and pipette them into the sample wells. To compare the size of your DNA fragments with a molecular weight size marker, add it to the first well. Then apply an electrical field along the length of the gel. As the backbones of the DNA are negatively charged, the fragments will migrate towards the positively charged electrode and separate depending on their size – the bigger the fragments the slower they migrate. After running the gel, visualize your DNA fragments by staining the gel with a fluorescent intercalating dye such as ethidium bromide and capture an image with a gel documentation system. Depending on the dye, you may need to add it before casting the gel.1

Equipment and buffer needed
To perform agarose gel electrophoresis, you need a gel electrophoresis system, an external power supply and a biosafety cabinet, as the intercalating dyes are hazardous.
The 2 most common buffers for agarose gel electrophoresis are TAE (Tris-acetate-EDTA) and TBE (Tris-borate-EDTA). The differences between the 2 are that TAE is better at separating large DNA segments (>15000 bp) while TBE is well suited for smaller fragments (<1000 bp). TBE should also be chosen for long or repeated runs, as it has a better buffering capacity and is therefore less prone to overheating. However, as borate is an enzyme inhibitor, you have to use TAE if you want to recover the bands and use the DNA for downstream applications involving an enzyme, such as PCR. And, most importantly, ensure that you don't mix the different buffers, e.g. by using TAE to cast your gel and then placing the tray in a tank filled with TBA.2,3,4,5
How to determine concentration and purity
Using agarose gel electrophoresis, the DNA concentration of your sample can only be roughly estimated by comparing the intensity of your DNA band with the corresponding band of the size marker. For example, if you load a 2 µl sample of undiluted DNA on the gel and your band has about the same intensity as the band from the 100 ng standard of the same length, your sample has a concentration of 50 ng/µl (100 ng divided by 2 µl).6
In addition to giving you a rough estimate of the concentration of your samples, agarose gel electrophoresis helps you to check their purity after DNA extraction protocols. For instance, if you have extracted genomic DNA, you can run a gel to see if your samples are contaminated with RNA, which could be detected as a low molecular weight smear.7
Running a gel is also recommended after PCR reactions, as they are highly sensitive and prone to contamination. Checking if the negative and positive controls provide the expected results will help you to identify master mix contaminations early and confirm the performance of the extraction protocol, reagents and amplification steps. Moreover, you will be able to see if only the sequence of interest has been amplified by verifying if you only get a single band. And, if you use a size marker, you can validate that the amplified DNA segments have the expected size.
Spectrophotometry
Spectrophotometry
Spectrophotometry measures the proportion of light of a certain wavelength that is absorbed by a sample. The absorbance values allow both qualitative and quantitative analysis of the sample, e.g. by determining the purity of a solution or the concentration of a certain analyte.
How does it work?
To measure DNA concentration and purity using spectrophotometry, you can either work with a microspectrophotometer or a spectrophotometer and microcuvettes.
If you're using a microspectrophotometer, you first need to clean the upper and lower pedestals with distilled water by pipetting a droplet onto the lower pedestal, closing the pedestal arm, waiting for a short time, raising the arm and wiping the pedestals with a dry, lint-free lab wipe.
Once you've cleaned the instrument, you should pipette a droplet of the buffer that the DNA is suspended or dissolved in, onto the lower pedestal. As soon as you lower the microspectrophotometer's arm, the liquid will form a column between the upper and lower pedestal, held in place by surface tension. To perform the spectral measurements, the microspectrophotometer passes light from a xenon flashlamp from the upper pedestal through the liquid and the lower pedestal where it is detected by the integrated spectrometer.
Performing a blank measurement with the buffer allows you to eliminate the influence of the absorbance of the buffer. Once you've zeroed the microspectrophotometer, you can measure the absorbance of your samples at wavelengths of 230 nm, 260 nm and 280 nm. In order to get reproducible results, your samples need to be homogeneous and well mixed. Additionally, ensure that you keep the pedestals clean by wiping each sample from both the upper and lower pedestals before adding the next one. We recommend performing a blank measurement after every 10 samples. If it shows no absorbance, proceed with the next batch of 10 samples, and if you detect absorbance, remove the residues of the previous samples by cleaning the pedestals with distilled water.

Working with a spectrophotometer is very similar, but instead of pipetting your blank and samples as droplets onto the lower pedestal, you instead pipette them into microcuvettes and insert them one by one into the spectrophotometer, which will perform the absorbance measurements for you.
Equipment needed
As just discussed, you can either use a spectrophotometer working with microcuvettes or a microspectrophotometer. Whereas a spectrophotometer is more sensitive, a microspectrophotometer can work with sample volumes as low as 0.5 µl. Many manufacturers also offer devices that combine the 2.
How to determine concentration, yield and purity
Spectrophotometers and microspectrophotometers calculate DNA concentration using the following formula:
Concentration (µg/ml) = A260 reading x conversion factor
The conversion factor is 50 µg/ml for dsDNA and 33 µg/ml for ssDNA.
Note: Don’t forget that you need to multiply the concentration by your dilution factor if you diluted your samples before taking the measurements.
Once you know the concentration of your sample, you can calculate its yield as follows, e.g. to determine if your PCR reaction generated a sufficient amount of DNA for your downstream application:
Yield (µg) = Concentration x Total sample volume (ml)
Spectrophotometry can also be used to determine the purity of a sample. Calculate the A260/A280 ratio to detect protein or RNA contamination and the A260/A230 ratio to detect contamination with chaotropic salts, EDTA, non-ionic detergents, proteins and phenol. Pure dsDNA has an A260/A280 ratio of 1.85-1.88. The A260/A230 ratio is commonly higher than the A260/A280 ratio and typically lies between 2.3-2.4 for dsDNA.8
Fluorometry
Fluorometry
Fluorometry is a technique used to identify and quantify analytes in a sample by adding fluorophores that bind to the analyte of interest to the sample, exciting them with a beam of UV light and detecting and measuring the emitted wavelength. By comparing the sample fluorescence to known standards, the analyte can be quantified.
How does it work?
In contrast to spectrophotometry, fluorometry requires an assay set-up. This means that you need to get an assay kit suitable for your sample consisting of a fluorescent dye, buffer and standards. When preparing your samples, follow the kit manufacturer's instructions to ensure that the fluorescent dye binds to your DNA and the standards. An overview of the most common fluorescent dyes can be found in the table below. Note that it’s important to avoid introducing air bubbles during pipetting and mixing steps as they could later on negatively influence the measurements of the fluorometer.
| Manufacturer | Dyes | |
|---|---|---|
| dsDNA | ssDNA | |
| Thermo ScientificTM | PicoGreenTM | OliGreenTM |
| Promega | QuantiFluor® dsDNA | QuantiFluor® ssDNA |
| InvitrogenTM (QubitTM) | Qubit dsDNA assay | Qubit ssDNA assay |
Before starting your measurements on the fluorometer, you need to calibrate the instrument by reading the PCR tubes containing the standards. The first standard should indicate a concentration of 0 ng/ml and the last one should indicate the maximum concentration of your assay range. After calibrating the fluorometer by creating the standard curve, you can add PCR tubes containing your samples one after the other.9
Equipment needed
As explained in the section above, you need a fluorometer and an assay kit to perform fluorescence measurements. If you have many samples to analyze, you can also use a microplate reader capable of measuring fluorescence with an integrated PC. The difference in the assay set-up would be that you add your samples and standards into a microplate instead of PCR tubes and then measure the fluorescence of the entire plate in one go.

How to determine concentration and yield
Fluorometers usually calculate the DNA concentration for you. If not, you can calculate it by comparing the fluorescence of your sample against the standard curve. As for spectrophotometry, don’t forget to multiply the concentration you get with the dilution factor and calculate the yield by multiplying the concentration with the total sample volume.
The purity of your DNA can’t be calculated with fluorometry as it only detects the fluorophores bound to the DNA and therefore can’t detect contaminants.
Spectrophotometry vs fluorometry
As we’ve just explained, fluorometers can’t measure the purity of DNA samples, only their concentration and yield. Another downside of fluorometry is that it’s more costly than spectrophotometry because of the expensive assay kits. It is also more time consuming, as you need to mix your samples with the fluorescent dye before analysis.
Its advantages over spectrophotometry are that it’s much more sensitive, providing better results with diluted samples, e.g. after DNA extraction. For example, the lower detection limit of the NanoDropTM spectrophotometer is 0.4 ng/µl, whereas that of the Qubit fluorometer is 0.005 ng/µl.10,11 On top of this, fluorometers don’t overestimate the DNA concentration, as they don’t detect the absorbance of other sample components, such as proteins. Another advantage of fluorometry is that you can use microplate readers capable of analyzing an entire microplate in one run, significantly increasing your throughput.
After PCR, neither the sensitivity nor the overestimation of the concentration are usually a problem, as you have a very high number of the DNA segment of interest (amplicon) anyway. This means that spectrophotometry is the preferred method after a PCR reaction, unless you need to determine the concentration very precisely, for example if your downstream application is next generation sequencing (NGS). For NGS assays, you can pool up to 96 samples to analyze them in one go, and these samples need to have exactly the same concentration in order to deliver the desired results, making fluorometry the ideal method.
As it’s very critical to have the same DNA concentration in all your samples when pooling them for an NGS assay, you may even want to double check your fluorometry results, for example with the TapeStation system from Agilent. It works similarly to gel electrophoresis, but is fully automated. Once you have inserted your samples, tips and the ScreenTape (a small cassette containing electrodes, a gel matrix and a buffer suitable for your sample type), the TapeStation can automatically analyze up to 16 samples and will provide you with a gel image and a concentration measurement for each sample.12
What we use in our own lab
For our own lab, we bought a gel electrophoresis system for the visualization of DNA and a microspectrophotometer that we use for an additional quality check and concentration measurements. Since spectrophotometry is usually precise enough for our downstream applications, we didn’t purchase a fluorometer. If we do need to perform an NGS assay, we buy an assay kit and perform the fluorescence measurements on a microplate reader that we already own.
Conclusion
To check the success of your DNA extraction protocols and PCR reactions, and to determine the concentration, yield and purity of your DNA samples, you usually need to use a combination of quantification methods. Gel electrophoresis and spectrophotometry are suitable for most samples and applications, but if you work with diluted samples or need highly precise concentration measurements for downstream applications, such as NGS, a fluorometer may be required as well. You could even consider getting a TapeStation to double check the results.
We hope that this blog post answered all your questions on DNA quantification. But what if it turns out that your samples aren’t pure enough? Read our blog post on DNA purification to get the answer.