Comprehensive introduction to DNA extraction
Written by Éva Mészáros
29. May 2024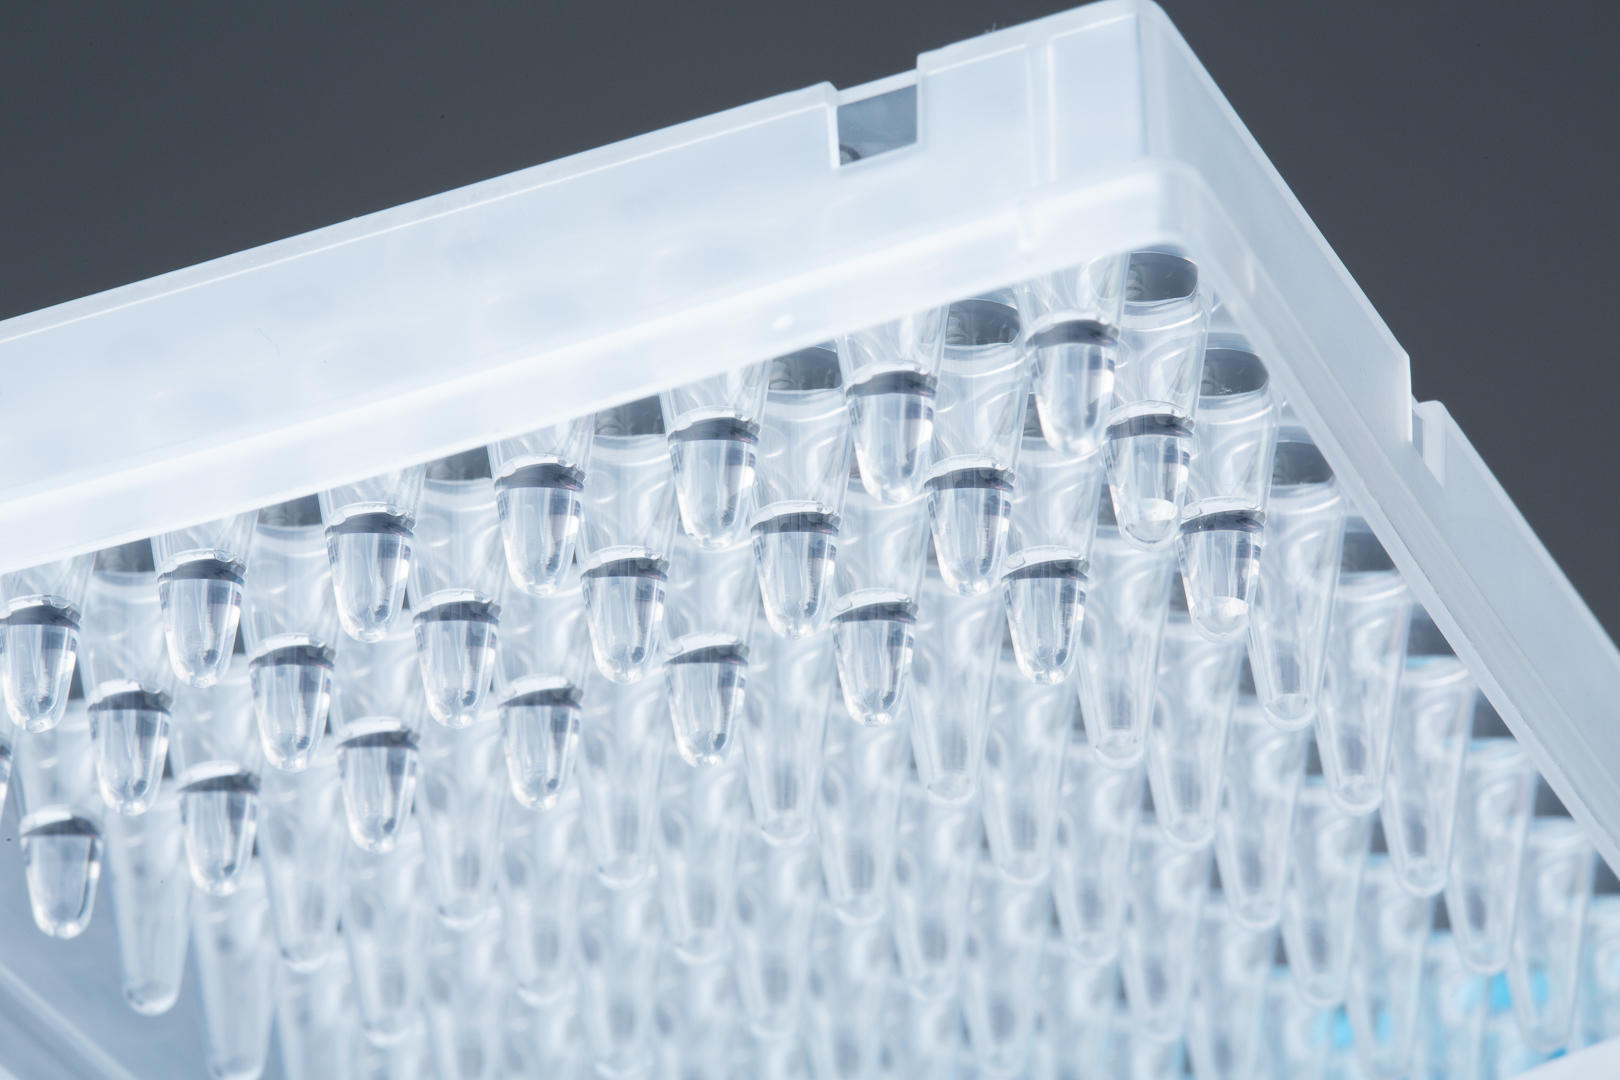
DNA extraction is often the initial step for molecular biology applications. When samples arrive in the lab, several techniques can be employed to isolate DNA for downstream applications such as polymerase chain reaction (PCR). In this article, we'll explore the different methods available and their equipment requirements, advantages and drawbacks. We'll also revise some outdated techniques and explain why they're no longer suitable today. Understanding these processes will help you to select the best approach for your lab, ensuring accurate DNA isolation for all your applications.
This blog post represents the second part of a series of 5 articles on how to get from samples to pure DNA.
Table of contents

What is DNA extraction?
Various processes have to be performed to extract DNA from samples – such as blood, cultured cells, microbes, soil, or plant and animal tissues – depending on the sample type and downstream application. These steps include cell lysis, inactivation of nucleases, and purification to separate the target DNA molecules from cellular debris.
The first DNA extraction was performed in 1869 by the Swiss physician Friedrich Miescher, who isolated DNA from leukocytes when he was trying to determine the chemical composition of cells.1 Since then, DNA extraction has been extensively studied and further developed. The different methods available are discussed in more detail below. Please note that most of these techniques can also be used if you want to extract RNA instead of DNA from your samples.
DNA extraction methods
To extract a sufficient yield of high quality, purified DNA for your downstream applications, you have to find the best extraction method, or combination of methods, for your sample type. This chapter gives an overview of the most common techniques, explains how they work, and discusses their advantages and disadvantages. We’ll also tell you what kind of equipment you need for which method, and what we work with in our own lab.
Conventional methods
Let's first take a look back at 2 DNA extraction methods that have been developed over the last 150 years, and discuss why they should no longer be used, even though they are quick and easy to perform.
Rapid one-step extraction
As the name implies, this method consists of only 1 step. An extraction buffer containing Tris-HCl, EDTA, sodium lauryl sarkosyl and water insoluble PVPP is added to the sample. The mixture is then incubated, cooled and diluted in double-distilled water.2 This sounds great but, unfortunately, this method lacks any purification steps, so often leads to inaccurate or unreliable results. Although you would be able to extract DNA from non-complex samples – such as Gram-positive bacteria – with this method, it is no longer used because PCR inhibitors are co-extracted, and buffer substances, like EDTA, are carried over and can strongly influence downstream applications. As well as this, today's applications – such as qPCR or next generation sequencing (NGS) – are very sensitive, and require DNA with high purity.
Chelex 100 extraction
For Chelex 100 extraction, an extraction buffer containing Chelex 100 resin, SDS, NP40 and Tween® 20 is added to the sample. The mixture is incubated at 100 °C for 30 min, then centrifuged. The supernatant is removed, and adjusted to a final concentration of 10 mM Tris-HCl and 1 mM EDTA.2 Due to a lack of purification steps, this method results in low purity, and cannot efficiently remove PCR inhibitors from complex matrices. In addition, the high temperature and alkalinity of the protocol can denature the DNA.3 Therefore, Chelex 100 extraction is rarely used today when alternative methods, such as spin column extraction, take the same amount of time and offer much better results.
Furthermore, conventional DNA extraction methods are not suitable for tough-to-lyse samples, including yeast, human tissue, animal tissue or plant material, which require both chemical and physical cell lysis steps.
Commonly used methods
Most labs now isolate DNA by using sample- and application-specific kits for spin column or magnetic bead extraction workflows. But before we look at these methods in detail, we'll briefly discuss some solution-based methods.
Solution-based methods
Solution-based methods can be useful for sample types that don't provide the desired output with spin column or magnetic bead extraction. These materials may contain large particles, such as soil or dust, or could involve large sample volumes, for example chemostat cultures.
CsCl density gradient centrifugation with EtBr
To extract DNA using cesium chloride (CsCl) density gradient centrifugation with ethidium bromide (EtBr), you need to mix your lysed samples with CsCl and EtBr and subject them to high speed centrifugation. CsCl is an extremely dense salt, and will set up a concentration gradient, whereas EtBr will intercalate into DNA molecules, which separate into bands according to their density. Since EtBr becomes fluorescent under UV light, you can easily locate and extract the DNA bands. EtBr can subsequently be removed from the extracted DNA using ethanol precipitation.3,4,5,6
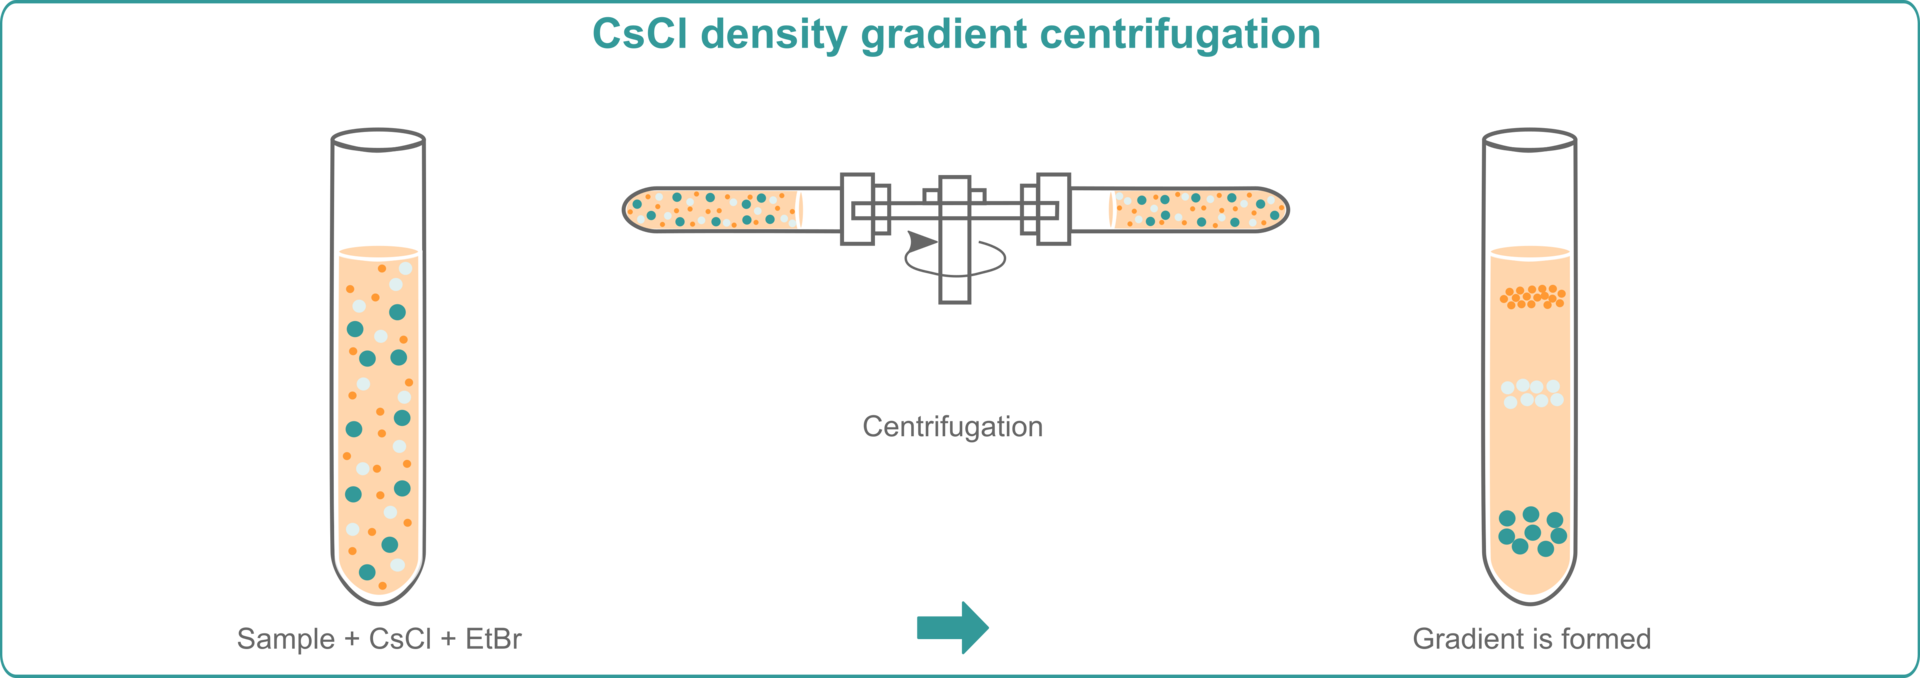
The advantage of this method is that it provides good yields of high purity DNA. However, the disadvantages are that it's laborious and time consuming, since the samples need to be centrifuged for at least 24 hours. The technique is also costly because it requires the purchase of an expensive ultracentrifuge. In addition, EtBr is a mutagen, so users must take adequate precautions when working with this substance.3,4,5,6 You will therefore need a biosafety cabinet for the pipetting steps involving EtBr if you're planning to use this DNA extraction method in your lab.
Phenol-chloroform extraction
To perform phenol-chloroform extractions, you need to mix your lysed samples with a phenol-chloroform solution and centrifuge them for a few minutes. After centrifugation, you will see 3 phases: an upper aqueous phase containing DNA, a lower organic phase of lipids, and an interphase comprising proteins. Remove the aqueous phase and use ethanol precipitation to purify and concentrate the DNA.7,8
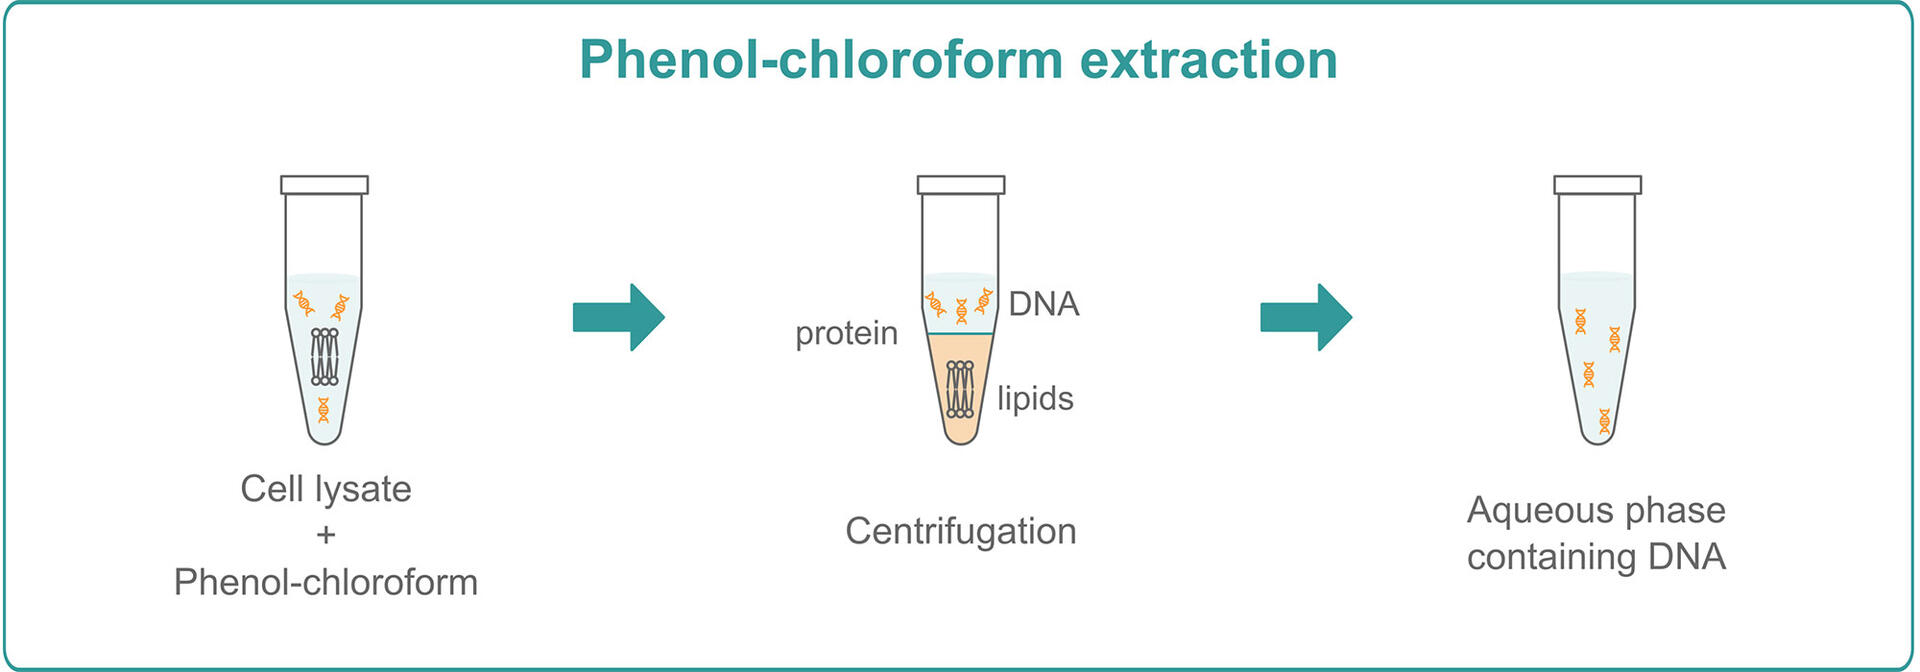
Just like CsCl density gradient centrifugation with EtBr, phenol-chloroform extraction provides high yields and, since you only need a centrifuge instead of an ultracentrifuge, it's much faster and more economical. However, compared to the solid phase extraction methods below, it’s still very time consuming and usually needs to be performed manually, which leads to higher variability and lower reproducibility. In addition, if you want to perform phenol-chloroform extractions, you will not only need to purchase a centrifuge, but also a chemical fume hood, as phenol and chloroform are volatile and highly toxic, and shouldn't be handled on an open bench.
Solid phase extraction methods
In a nutshell, solid phase extraction can be defined as follows: DNA is bound to a solid surface – such as a silica membrane or magnetic beads – unwanted unbound materials are washed away, and the DNA is detached from the solid phase. The 2 most common solid phase extraction methods that we’ll look at in more detail are spin column extraction and magnetic bead extraction.
Spin-column extraction
Spin-column extraction is usually performed with a specific kit. The various kits available on the market differ slightly from each other, but all follow the same basic principle. First, you need to lyse your samples by adding a lysis buffer. Chemical lysis is often combined with physical methods such as bead beating or shaking to break down the cell membrane. Then, the samples are transferred into spin columns. These are centrifuged and DNA binds to the membrane inside the column while other unwanted materials pass through it. To wash away all non-bound components, several centrifugation steps with a wash buffer are needed. At the end, you have to add an elution buffer to the spin columns to liberate the DNA from the membrane and centrifuge them 1 last time to elute the DNA.
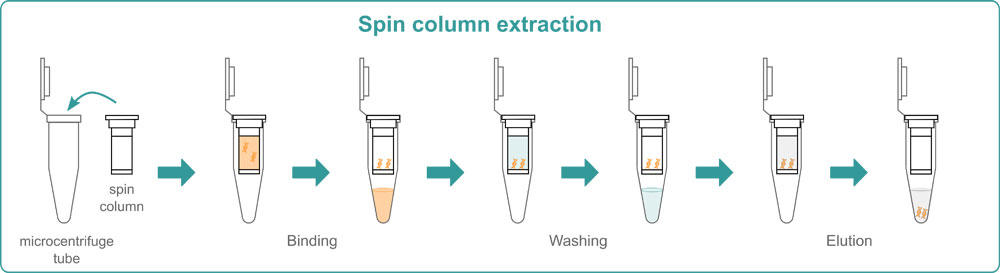
Spin columns are available as individual columns or in a 96 well format. The 96 well silica membrane plates can also be placed on a vacuum manifold instead of being centrifuged. This means that you either need a centrifuge or a vacuum manifold with a pump to perform this method in your lab. The advantages of spin column extraction are that it’s quick and easy to perform, and that you can adapt it to the number of samples that you have; use single columns if you have only a few samples, and the 96 well format if you need higher throughput. The major drawbacks are that the membrane can sometimes get clogged, and that a minimum elution volume of 30-50 μl is required, which leads to lower DNA concentrations.
Magnetic bead extraction
Magnetic bead extraction is also performed with specific kits. As with spin column extraction methods, you need a lysis buffer and, depending on the sample, a physical lysis method to disrupt the cells. After sample lysis, magnetic beads that bind the DNA of your samples are added. The tubes are then placed on a magnet, and the supernatant is aspirated to remove unwanted unbound material. This step is repeated several times, replacing the wash buffer in between. For the final stage, an elution buffer is added to detach the DNA from the beads, before transferring the samples to a different vessel.

If you wish, you can also watch our video explaining in more detail how the method works.
The huge advantage of magnetic bead extraction is that the equipment can be adapted to your budget. Essentially, all you need for the technique is a magnetic stand. However, if you don't want to perform the workflow manually, you can also buy a dedicated purification system. It works with magnetic beads too, but typically uses several vessels pre-filled with the different buffers, and then transfers the beads from one vessel to the next using magnetic rods. The third option for those who want to reduce manual pipetting steps, but don't have the budget to get a purification system, is to purchase a benchtop pipetting robot or a 96 or 384 channel pipette. Both devices reduce manual liquid handling steps and increase throughput, and can also be used for other applications in the lab.
Compared to the spin column method, magnetic bead extraction can work with lower elution volumes, and its throughput can be ramped up more easily, because you can work in a 384 well format. However, manually performing magnetic bead extractions is more tedious and error prone, as you need to be careful not to aspirate the magnetic beads.
Which method do we use?
In our own in-house lab, we decided to go with both spin column and magnetic bead extraction methods, and purchased a centrifuge, vacuum manifold and pump. This gives us the flexibility to work with a wide range of kits and meet different throughput requirements. If we have a very low sample number, we can extract DNA quickly by using single spin columns and the centrifuge. If we have higher sample numbers, we can use either 96 well silica membrane plates and the vacuum manifold, or one of our benchtop pipetting platforms in combination with magnetic modules for bead extraction.
Conclusion
We hope that our evaluation of the different DNA extraction methods helps you decide which technique to use for your sample and application. In the next part of our blog series on how to get from samples to pure DNA, we’ll focus on what you need to consider when it comes to PCR – check it out to get even more useful tips!